Using geopandas on Windows
This guide was written in 2014 and updated slightly in November 2020.
I recently went through the exercise of installing geopandas on Windows. Having learned several valuable lessons, I thought I’d share them with the world in case anyone else is trying to get this toolkit working in a Windows environment. It seems that pip installing geopandas usually works fine on Linux and Mac. However, several of its dependencies have C extensions that can cause compilation failures with pip on Windows. This guide gets around that issue.
The best bet on Windows is to install Python wheels when possible, because they contain pre-compiled extensions. The conda package manager that comes with Anaconda/Miniconda does this for packages available in its repository, including channels like conda-forge. Alternatively, Christoph Gohlke at UC Irvine maintains a large library of Python wheels for Windows.
Installing geopandas the easy way
First, try to install geopandas (and JupyterLab) the easy way using conda and conda-forge. From your command prompt, run:
conda config --prepend channels conda-forge
conda create -n geo --strict-channel-priority geopandas jupyterlab
Then activate your new geo environment and run some code. If that doesn’t work, install it the manual but foolproof way…
Installing geopandas and its dependencies manually
- First and most important: do not try to directly pip install or conda install any of the dependencies - if you do, they will fail in some way later, often silently or obscurely, making troubleshooting difficult. If any are already installed, uninstall them now.
- Download the wheels for GDAL, Fiona, pyproj, rtree, and shapely from Gohlke. Make sure you choose the wheel files that match your architecture (64-bit) and Python version (2.7 or 3.5). If Gohlke mentions any prerequisites in his descriptions of those 5 packages, install the prerequisites now (there might be a C++ redistributable or something similar listed there).
- If OSGeo4W, GDAL, Fiona, pyproj, rtree, or shapely is already installed, uninstall it now. The GDAL wheel contains a complete GDAL installation - don’t use it alongside OSGeo4W or other distributions.
- Open a command prompt and change directories to the folder where you downloaded these 5 wheels.
- pip install the GDAL wheel file you downloaded. Your actual command will be something like: pip install GDAL-1.11.2-cp27-none-win_amd64.whl
- Add the new GDAL path to the windows PATH environment variable, something like C:\Anaconda\Lib\site-packages\osgeo
- pip install your Fiona wheel file, then your pyproj wheel file, then rtree, and then shapely.
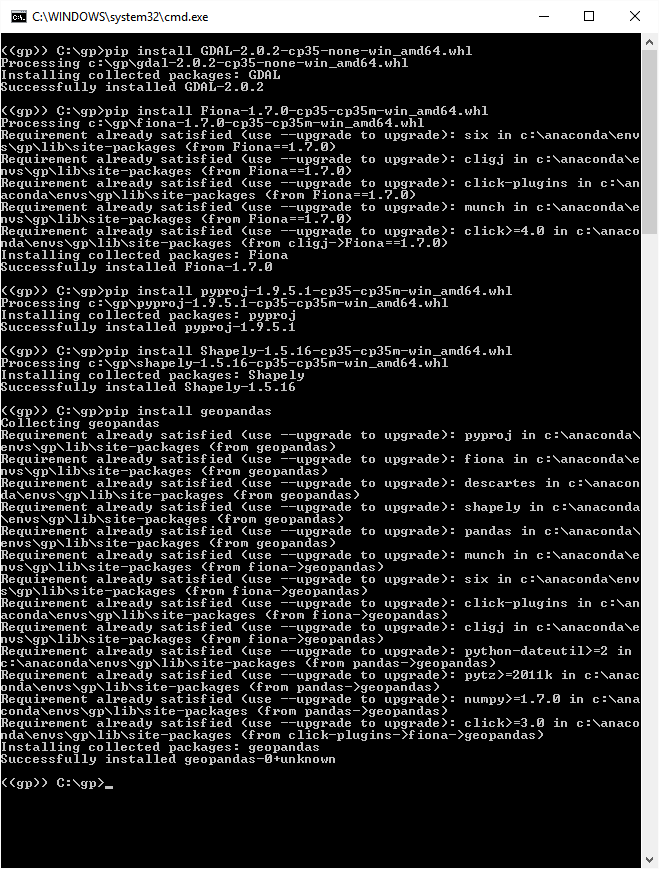
- Now that GDAL and geopandas’s dependencies are all installed, you can just pip install geopandas from the command prompt, like this (click for full-size):
Verifying the geopandas installation
Close the command prompt. To test GDAL, re-open the command prompt and run:
gdalinfo --help-general
This command will display GDAL usage instructions if it’s installed properly and the Windows PATH variable is pointing correctly to its install directory. Lastly, test the Python bindings and geopandas itself. From a Python interpreter, run the following lines of code:
from osgeo import gdal, ogr, osr
from fiona.ogrext import Iterator, ItemsIterator, KeysIterator
from geopandas import GeoDataFrame
gdal.VersionInfo()
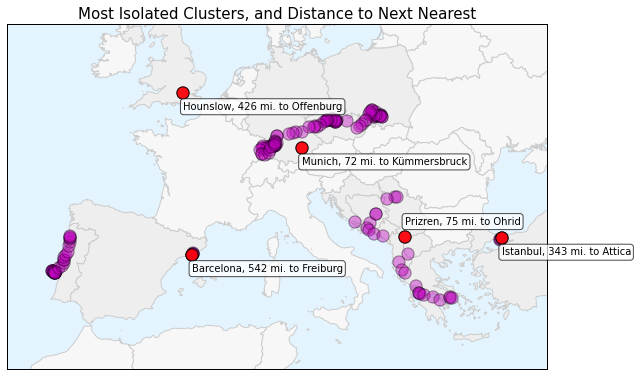
If each of these lines of code runs successfully without errors, then geopandas is successfully installed and ready to be used. Here’s a simple example of using geopandas with matplotlib to plot point data over a shapefile basemap:
For more advanced examples, see this tutorial on R-tree spatial indexing with geopandas, and an intro to the OSMnx package that uses geopandas to work with OpenStreetMap street networks. You may also be interested in this simple GitHub gist I put together on a quick way to install geopandas as part of a Python spatial science stack, with Miniconda.